Getting Started
A complete install guide for OpenMake LLM, written for a machine with nothing on it yet. Work through steps 0 to 6 in order and you will end up with a running instance you can sign in to.
ℹ️What This Takes
- Time: about 30 minutes on a fresh machine, most of it downloads.
- Disk: roughly 5 GB for Node, Docker, and the project dependencies.
- A GPU is not required. Step 1 offers a no-GPU path that uses a hosted provider.
- Command line: every step is a command you paste into Terminal (macOS/Linux) or PowerShell (Windows).
Step 0 · Install Prerequisites
Three tools must exist before you clone anything: Git, Node.js 24, and Docker. Install them for your operating system, then run the verification block at the end of this step.
Install Homebrew first if you do not have it, then the three tools. Docker Desktop must be launched once from Applications before the docker command works.
/bin/bash -c "$(curl -fsSL https://raw.githubusercontent.com/Homebrew/install/HEAD/install.sh)"

brew install git node@24
brew install --cask docker
open -a Docker
Run these in PowerShell. Reopen PowerShell afterwards so the new PATH takes effect, and start Docker Desktop from the Start menu once.
winget install --id Git.Git -e
winget install --id OpenJS.NodeJS -e --version 24.16.0
winget install --id Docker.DockerDesktop -e
The distribution package for Node is usually too old, so install Node 24 from NodeSource. Log out and back in after the usermod line so the docker group applies.
sudo apt update && sudo apt install -y git curl ca-certificates

curl -fsSL https://deb.nodesource.com/setup_24.x | sudo -E bash -
sudo apt install -y nodejs

curl -fsSL https://get.docker.com | sudo sh
sudo usermod -aG docker $USER
Verify before continuing
Every line below must print a version. If any of them errors, fix that tool before moving on.
git --version            # any recent version
node --version           # must start with v24
npm --version            # ships with Node
docker --version         # any recent version
docker ps                # must succeed, not "cannot connect to the Docker daemon"
⚠️Node Must Be 24.x
"engines": { "node": ">=24 <25" }, and npm install fails on other majors. If node --version shows something else, install a version manager and pin it — the repo ships a .node-version file reading 24.16.0:# macOS / Linux — using fnm brew install fnm # or: curl -fsSL https://fnm.vercel.app/install | bash fnm install 24.16.0 fnm use 24.16.0
Step 1 · Choose an LLM Backend
OpenMake does not contain a model. It talks to an OpenAI-compatible endpoint, and you have to point it at one. Pick a path now, because it decides what you write into .env in step 3.
Hosted provider
Works on any laptop. Sign up at a provider such as OpenRouter, create an API key, and use it as the gateway. You pay the provider per token; nothing runs on your machine.
Local vLLM + LiteLLM
Fully private and free to run, but it needs an NVIDIA GPU with enough VRAM for the model plus a separate vLLM and LiteLLM install. This is what the reference deployment uses.
Path A — hosted provider (recommended for a first install)
Create a key at openrouter.ai/keys, then keep these three values for step 3. Confirm the key works before continuing — a 200 here means you are ready.
LLM_BASE_URL=https://openrouter.ai/api/v1
LLM_API_KEY=sk-or-v1-...your key...
LLM_DEFAULT_MODEL=openai/gpt-4o-mini
curl -s -o /dev/null -w "%{http_code}\n" \
  https://openrouter.ai/api/v1/models \
-H "Authorization: Bearer $LLM_API_KEY"⚠️The /v1 Suffix Is Not Optional
LLM_BASE_URL is passed straight to the OpenAI SDK, which appends /chat/completionsto it. So the value must already end at the point where that path is valid. For OpenRouter that means https://openrouter.ai/api/v1 — dropping /v1 produces a 404 on every request. A local LiteLLM proxy answers on both, so http://localhost:4000 is fine there.Path B — local vLLM behind LiteLLM
Needs an NVIDIA GPU and CUDA drivers. Serve the model with vLLM, then put LiteLLM in front so one endpoint exposes every model id. Reference configs live in scripts/vllm/ in the repository.
pip install vllm litellm

# Terminal 1 — serve the model
vllm serve Qwen/Qwen3.6-35B-A3B --port 8000 --served-model-name qwen3.6-35b-a3b

# Terminal 2 — LiteLLM proxy in front of it
litellm --config scripts/vllm/litellm.config.yaml --port 4000

# Terminal 3 — confirm the catalog is exposed
curl http://localhost:4000/v1/models
The values for step 3 are then LLM_BASE_URL=http://localhost:4000, LLM_API_KEY set to your LiteLLM master key, and LLM_DEFAULT_MODEL=qwen3.6-35b-a3b.
Step 2 · Install OpenMake
Clone the repository
This creates an openmake_llm folder wherever you run it. Every later command assumes you are inside that folder.
git clone https://github.com/openmake/openmake_llm.git
cd openmake_llm
Install dependencies
One command covers every workspace — apps/api, apps/web, apps/discord-bot, and packages/*. It downloads a few thousand packages, so give it a couple of minutes.
npm install
Step 3 · Configure .env
Create your .env from the template
The repository ships .env.example. Copy it — never edit the example itself, and never commit your .env.
cp .env.example .env      # macOS / Linux
copy .env.example .env    # Windows PowerShell
Generate the three secrets
JWT_SECRET, API_KEY_PEPPER, and TOKEN_ENCRYPTION_KEY must each be a random 32-byte hex string. The server refuses to boot if JWT_SECRET is shorter than 32 characters. Run this three times and paste one value into each variable.
openssl rand -hex 32
On Windows without OpenSSL, Node can do the same job:
node -e "console.log(require('crypto').randomBytes(32).toString('hex'))"Set the database password in two places
Pick one password and write it into both the connection string and the container variables. In .env.example the POSTGRES_* lines are commented out — uncomment them, or Docker Compose will refuse to start in step 4.
DATABASE_URL=postgresql://openmake:CHOOSE_A_PASSWORD@localhost:5432/openmake_llm

POSTGRES_USER=openmake
POSTGRES_PASSWORD=CHOOSE_A_PASSWORD
POSTGRES_DB=openmake_llm
POSTGRES_PORT=5432
Fill in the LLM backend from step 1
Use whichever set of three values you prepared. Path A shown here; for path B use http://localhost:4000 and your local model id.
LLM_BASE_URL=https://openrouter.ai/api/v1
LLM_API_KEY=sk-or-v1-...your key...
LLM_DEFAULT_MODEL=openai/gpt-4o-mini
Set the first admin account
This account is seeded on first boot and is how you sign in at the end. The password needs 8+ characters with an uppercase letter, a digit, and a symbol.
[email protected]
ADMIN_PASSWORD=Your-Strong-Passw0rd!
PORT=52416
⚠️Boot Fails Fast on a Bad .env
JWT_SECRET must be at least 32 characters or Invalid LLM_BASE_URL. Read the first error, fix that one line, and start again.Environment Reference
| Variable | Description |
|---|---|
| DATABASE_URL | PostgreSQL connection string (required) |
| POSTGRES_USER | Container database user (default: openmake) — must match DATABASE_URL |
| POSTGRES_PASSWORD | Container database password — required by infra/docker-compose.yml, must match DATABASE_URL |
| POSTGRES_DB | Container database name (default: openmake_llm) — must match DATABASE_URL |
| POSTGRES_PORT | Host port mapped to the container (default: 5432) |
| JWT_SECRET | Auth token signing key — openssl rand -hex 32, minimum 32 chars (required) |
| API_KEY_PEPPER | API key hashing salt — openssl rand -hex 32 (required in production) |
| ADMIN_PASSWORD | Initial admin account password (required) |
| TOKEN_ENCRYPTION_KEY | AES-256-GCM key for external provider credentials (required) |
| LLM_BASE_URL | LiteLLM proxy endpoint (default: http://localhost:4000) |
| LLM_API_KEY | LiteLLM master key, or the vLLM --api-key value |
| LLM_DEFAULT_MODEL | Default model id in the proxy catalog (e.g. qwen3.6-35b-a3b) |
| LLM_POOL_DEFAULT_CTX | Context-fit window for the safety net (default: 262144) |
| OMK_CHAT_MODEL | Optional chat role override; falls back to LLM_DEFAULT_MODEL |
| OMK_AGENT_MODEL | Optional agent role override; falls back to LLM_DEFAULT_MODEL |
| OMK_ROUTER_MODEL | Optional routing role override; falls back to LLM_DEFAULT_MODEL |
| PORT | Server port (default: 52416) |
| DEFAULT_ADMIN_EMAIL | Admin login email (default: [email protected]) |
| GOOGLE_CLIENT_ID | Google OAuth 2.0 Client ID (optional) |
| GOOGLE_CLIENT_SECRET | Google OAuth 2.0 Secret (optional) |
| GOOGLE_API_KEY | Google Custom Search API Key (optional) |
| GOOGLE_CSE_ID | Custom Search Engine ID (optional) |
| EXTERNAL_MODELS_CACHE_TTL_MS | Optional cache TTL for external provider model catalogs |
| DB_AUTO_MIGRATE | Set to false to skip the automatic migration run at boot and apply them by CLI instead |
| NODE_ENV | development or production; production additionally requires API_KEY_PEPPER and secure cookies |
Step 4 · Start the Database
PostgreSQL 16 runs in Docker. Docker Desktop must already be running — check that docker psresponds before you continue.
Launch PostgreSQL
Run this from the repository root. The --env-file .env flag is required, not cosmetic — see the warning below.
docker compose --env-file .env -f infra/docker-compose.yml up -d postgres
⚠️Why --env-file .env Is Required
.env file next to the compose file, which means infra/.env — not the one you just edited at the repository root. Without the flag the command stops with:required variable POSTGRES_PASSWORD is missing a value
POSTGRES_PASSWORD line in your .env is still commented out — go back to step 3.3.Confirm it is healthy
Wait for the status to read healthy. The first launch also runs the baseline schema from db/init/, so give it a few seconds.
docker ps --filter name=openmake-postgres
docker exec openmake-postgres pg_isready -U openmake -d openmake_llm
ℹ️Migrations Run Themselves
db/migrations/ under an advisory lock, and exits if any of them fail. Set DB_AUTO_MIGRATE=false only if you want to drive them manually with the CLI.Step 5 · Build & Run
Build both applications
This compiles the TypeScript API and produces the Next.js production build. Expect a few minutes.
npm run build
Start the API and the web UI
These are two separate processes and you need both. Open two terminal windows in the project folder and run one command in each.
# Terminal 1 — API on port 52416
npm start

# Terminal 2 — web UI on port 3000
npm run start --workspace=apps/web
⚠️npm start Alone Does Not Give You a UI
npm start launches only the API. Opening http://localhost:52416 at that point returns Dashboard UI files not found, which is expected — that port serves the API, not the interface. The interface is the Next.js app on port 3000.Development mode instead
For hot reload while editing, skip the build and run both in watch mode from a single terminal.
npm run dev                 # API + web together
npm run dev:api             # API only
npm run dev:frontend-next   # web only
💡Keeping It Running
openmake-llm for the API and openmake-next for the web UI, defined in ecosystem.config.js. PostgreSQL, Redis, and the agent / MCP / artifact sandboxes stay in Docker for isolation.Step 6 · Verify & Sign In
Check the API is alive
A 200 means the API booted, reached PostgreSQL, and finished its migrations.
curl -s -o /dev/null -w "%{http_code}\n" http://localhost:52416/healthSign in to the web UI
Open http://localhost:3000 in a browser and log in with the DEFAULT_ADMIN_EMAIL and ADMIN_PASSWORD you set in step 3.5. That account is created on the first boot only.
Send a first message
Type anything into the chat box. A reply confirms the whole chain works — browser, API, database, and your LLM backend from step 1. If it fails here, the backend configuration is the place to look.
Web UI
http://localhost:3000
Dev Portal
http://localhost:3000/developer
API Docs
http://localhost:52416/api-docs
Local Model Runtime
OpenMake LLM resolves every request through a local OpenAI-compatible gateway configured by LLM_BASE_URL. Each functional role resolves its model through one registry with a fail-open chain: per-user mapping → admin-set global → role env var such as OMK_CHAT_MODEL → LLM_DEFAULT_MODEL.
| Capability | Runtime | How It Is Used |
|---|---|---|
| Chat | OMK_CHAT_MODEL → LLM_DEFAULT_MODEL | Default response generation (262K context-fit window) |
| Vision | qwen3.6-35b-a3b | Image analysis and OCR-style workflows on the same chat model |
| Tool Loop | local-llm + MCP | Always-on tool loop, up to 5 tool turns per request |
| Agent Task | OMK_AGENT_MODEL → LLM_DEFAULT_MODEL | Autonomous multi-turn runs inside a Docker sandbox |
| Image Generation | flux2-klein | Local FLUX.2-klein-9B node behind the LiteLLM proxy |
| Embeddings | bge-m3 | Multilingual embedding node in the local catalog |
| External — OpenRouter | openrouter:<model> | BYO sk-or- key; one endpoint for 300+ models (GPT-5, Claude, Gemini, DeepSeek) |
| External — Ollama Local | ollama-local:<model> | Your own Ollama server; no key, LAN hosts need SSRF_ALLOWED_HOSTS |
| External — Ollama Cloud | ollama-cloud:<model> | Hosted large models such as deepseek-v3.1:671b-cloud |
| External — NVIDIA NIM | nvidia:<model> | BYO nvapi- key; Llama 4 Maverick, Qwen3 Next 80B, Mistral Nemotron |
| Streaming | OpenAI-compatible gateway | Server-sent or websocket response streaming |
💡Verify Local Gateway
Before starting the server, verify that the gateway exposes the model configured in LLM_DEFAULT_MODEL:
curl http://localhost:4000/v1/models
curl http://localhost:52416/api/v1/models -H "Authorization: Bearer $OPENMAKE_API_KEY"
Features & MCP
Ecosystem: 18 Domains & 100 Specialized Agents
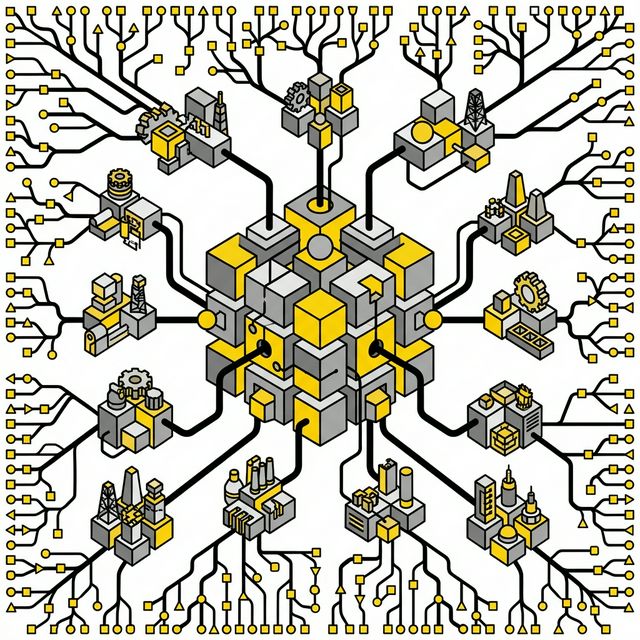
100 Specialized Agents
Built-in specialists organized across 18 industry domains
Thinking Display
Reasoning renders as a live timeline with a one-line headline, persisted across sessions
OpenAI Tool Calling
Supports OpenAI-compatible tools API and tool_calls responses
22 Built-in MCP Tools
Available to every user — subscription and tool-tier gating were removed
External MCP Servers
Install from the catalog in Settings → Connectors; each server runs Docker-isolated
Web Search
Real-time web information retrieval (Google Custom Search)
Chat Attachments
Image and file analysis through chat workflows
Git Ingest
Import skills, custom agents, and MCP servers straight from a Git repository
Agent Tasks
Autonomous multi-turn runs in a persistent Docker sandbox, with templates and recurring schedules
Artifacts
Sandboxed iframe rendering, optional Docker code execution, and a strict-CSP shared viewer
Deep Research
Fan-out search → source fetch → claim verification → cited synthesis
Four External Providers
OpenRouter, Ollama Local, Ollama Cloud, and NVIDIA NIM on your own key, encrypted and SSRF-guarded
Data Export & Chat Delete
Support for exporting data and deleting conversations via Settings
CLI Reference
| Command | Description | Usage |
|---|---|---|
| chat | Interactive AI Chat | cli.js chat [-m model] |
| ask | Single Q&A | cli.js ask <q> [-m model] |
| generate | Code generation | cli.js generate <desc> ... |
| review | Code review | cli.js review <file> |
| explain | Code explanation | cli.js explain <file> |
| cluster | Start server | cli.js cluster [-p port] |
| nodes | List runtime nodes | cli.js nodes |
| mcp | MCP Server mode | cli.js mcp |
| plugins | Plugin management | cli.js plugins |
| models | List models | cli.js models |
| connect | LLM gateway connection test | cli.js connect |
| backfill-memories | Backfill semantic memories for a user | cli.js backfill-memories <userId> |
API Reference
| Group | Routes | Description |
|---|---|---|
| Chat & AI | /chat, /chat/stream, /research, /chat/feedback | Chat sync + streaming, Deep research, Response feedback |
| Agent Tasks | /agent-tasks, /agent-task-schedules, /agent-task-templates | Autonomous runs, recurring schedules, reusable templates |
| Artifacts | /artifacts | Artifact persistence, publishing, and the shared viewer |
| Data & Content | /users/me/export, /users/me/memories, /chat/sessions | Account export, cross-conversation memory, conversation delete flows |
| System | /nodes, /metrics, /cluster, /monitoring | Node metadata, metrics, cluster health, runtime monitoring |
| Monitoring & Audit | /agents-monitoring, /audit | Agent performance, Audit logs |
| Auth & Admin | /auth, /admin, /api-keys, /usage, /users/me/model-roles | Auth + OAuth, admin console, API keys, usage stats, role→model mappings |
| Agents & Skills | /agents, /agents/skills, /users/me/agents | Industry agents, skill library, custom agents |
| Extensions | /mcp, /mcp/servers, /admin/mcp, /web-search, /push, /external | MCP tools + catalog, external MCP servers, web search, push, providers |
| Developer | /docs, /api/v1, /external-keys | API docs, OpenAI-compatible endpoint, External key management |
ℹ️Full Documentation
Tech Stack
Troubleshooting
required variable POSTGRES_PASSWORD is missing a value
Two causes. Either you omitted --env-file .env (Compose reads infra/.env by default, not the repository root), or the POSTGRES_PASSWORD line in .env is still commented out. Fix both, then rerun step 4.1.
Dashboard UI files not found. Please run build.
Not an error — you opened port 52416, which serves the API. The interface is the Next.js app on http://localhost:3000. Start it with npm run start --workspace=apps/web.
JWT_SECRET must be at least 32 characters
The placeholder from .env.example is still in place. Generate a real value with openssl rand -hex 32 and paste it in, then restart.
404 on every chat request
LLM_BASE_URL is missing its path prefix. The OpenAI SDK appends /chat/completions to it, so OpenRouter needs https://openrouter.ai/api/v1 — not .../api.
npm install fails with an engine error
Node is not 24.x. Check node --version, then install 24.16.0 with fnm or nvm — the repo pins it in .node-version.
cannot connect to the Docker daemon
Docker Desktop is installed but not running. Launch it and wait for the whale icon to settle, then retry docker ps.
Database Connection Error
The password in DATABASE_URL and POSTGRES_PASSWORD must be identical. If you changed it after the first launch, the old volume still holds the old password — docker compose --env-file .env -f infra/docker-compose.yml down -v recreates it, destroying existing data.
Port already in use
Something else holds 52416 or 3000. Change PORT in .env for the API, or pass a different port to the web app with next start -p.
Model Not Listed
LLM_DEFAULT_MODEL must be an id your gateway actually exposes. List them with curl $LLM_BASE_URL/models -H "Authorization: Bearer $LLM_API_KEY".